 Save
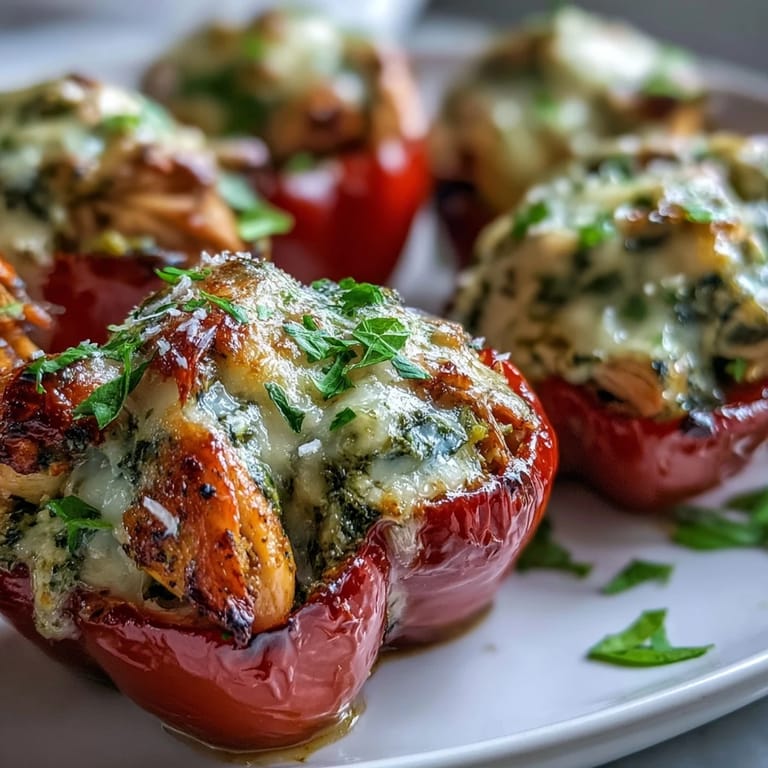
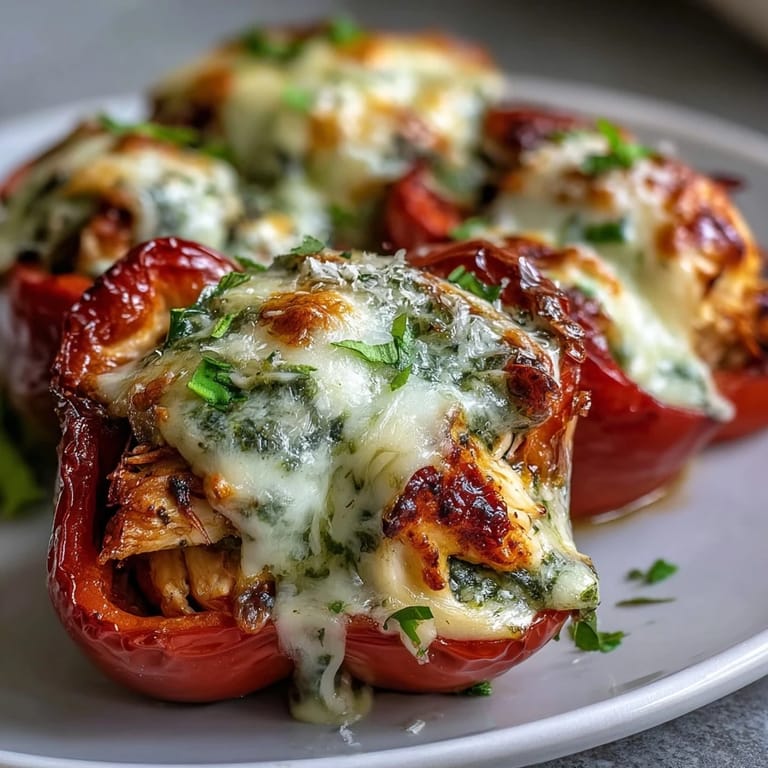
Save A friend showed up at my door one evening with a container of homemade pesto and leftover rotisserie chicken, wondering if we could turn them into something shareable. We started playing around with mini sweet peppers sitting in my crisper drawer, and somehow these jewel-like little boats came together in under an hour. Now they're the first thing I make when I need to impress without breaking a sweat.
I made these for a potluck last spring and watched them disappear before the salad had even been unwrapped. What stuck with me most was a neighbor who'd been hesitant about trying anything new, going back for a second one and then asking if they were difficult to make. That small moment reminded me that simple, genuine flavors often speak louder than complicated techniques.
Ingredients
- Cooked chicken breast, shredded: Two cups gives you enough filling without overwhelming the delicate peppers; rotisserie chicken from the store works beautifully and saves time on a weeknight.
- Basil pesto: A third cup is the right amount to coat everything in that green, aromatic goodness without making the filling soggy.
- Shredded mozzarella cheese: Half a cup melts into creamy pockets throughout the filling, creating those bubbling hot spots everyone loves.
- Grated Parmesan cheese: A quarter cup adds a sharp, salty note that balances the richness of the mozzarella beautifully.
- Garlic clove, minced: Just one small clove; fresh garlic brings brightness, but too much will overpower the delicate pesto flavor.
- Freshly ground black pepper: Toast it fresh if you have a grinder, as pre-ground pepper can taste a bit flat.
- Olive oil: A tablespoon helps bind everything together and keeps the filling from drying out in the oven.
- Mini sweet peppers: Sixteen halved peppers provide those gorgeous, tender vessels; look for ones that are about the same size so they cook evenly.
- Fresh basil leaves for garnish: Optional but worth it, as they add a final pop of color and that just-made quality to the dish.
Tired of Takeout? 🥡
Get 10 meals you can make faster than delivery arrives. Seriously.
One email. No spam. Unsubscribe anytime.
Instructions
- Set your oven and prep:
- Preheat to 400°F and line your baking sheet with parchment paper so cleanup is nearly effortless and nothing sticks.
- Build the filling:
- Toss the shredded chicken, pesto, both cheeses, garlic, pepper, and olive oil in a large bowl until everything is evenly coated and glossy. The mixture should feel loose enough to spoon but hold together without being wet.
- Arrange the peppers:
- Lay your halved peppers cut side up on the prepared sheet, making sure they sit flat so the filling won't spill out during baking.
- Fill and top:
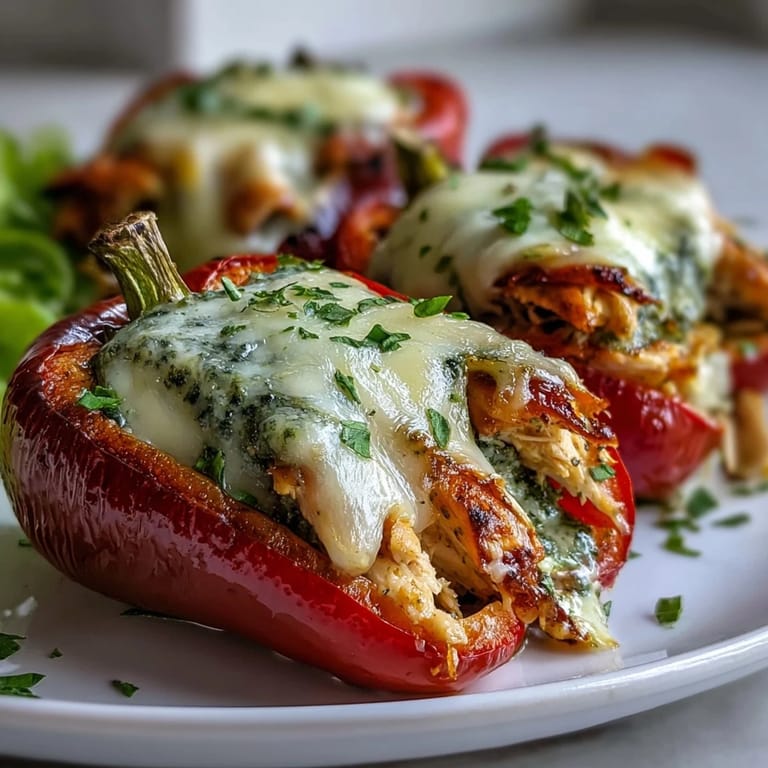
- Spoon the pesto chicken mixture into each pepper half with a gentle hand, pressing just enough so it nestles into place. A light sprinkle of extra mozzarella or Parmesan on top encourages that golden, bubbly finish.
- Bake until golden:
- Pop them into the oven for 18 to 20 minutes; you'll know they're done when the cheese is melted and bubbling at the edges and the peppers are tender but still holding their shape. Watch for the moment when the kitchen smells like basil and toasted cheese all at once.
- Finish and serve:
- Remove from the oven, scatter fresh basil leaves if using, and maybe one more pinch of Parmesan. Serve while they're still warm and the cheese is at its most luxurious.
 Save
Save One rainy Tuesday, my daughter helped me fill these peppers, carefully spooning the green mixture into each half with the kind of focus that only a kid can bring to a simple task. When we pulled them from the oven and she bit into one, her eyes lit up in that way that made me realize these aren't just appetizers—they're small moments of connection wrapped in sweet pepper skin and melted cheese.
Making Them Your Own
The beauty of this recipe is how willing it is to change. I've swapped in sun-dried tomatoes when fresh basil ran out, added crispy bacon because I had it on hand, and even tried spinach when I was trying to sneak vegetables into everything. The chicken and cheese provide an anchor strong enough to hold any variation you throw at it, so trust your instincts and the contents of your pantry.
Storage and Make-Ahead Magic
These keep beautifully in an airtight container in the refrigerator for up to two days, though I find they taste best eaten within the first day when the peppers still have a bit of firmness. You can also assemble them completely a few hours ahead, cover them with plastic wrap, and slide them into the oven whenever you're ready, which makes them perfect for when you're expecting guests but don't want to spend the entire afternoon cooking.
Serving Ideas and Occasions
I've served these at casual summer gatherings where everyone's standing around the patio, at proper dinner parties where they arrived on a real platter, and even packed a few in a container to bring to a friend recovering from surgery. They work equally well as a weeknight dinner with a simple salad, a party appetizer that feels elegant, or that thing you make when you want to eat something that feels a little fancy but doesn't require you to spend hours in the kitchen.
- Pair them alongside a crisp green salad and crusty bread for a light, complete meal.
- Serve them at room temperature if you're taking them to a gathering, and guests can warm them up or eat them as-is.
- Double or triple the batch if you're feeding a crowd; they freeze surprisingly well and can be reheated in a 350°F oven until warm through.
 Save
Save These stuffed peppers have become my go-to when I want to cook something that feels both generous and achievable. They remind me that the best meals are often the simplest ones, made with good intentions and whatever happens to be waiting in your kitchen.
Recipe Questions
- → Can I make these ahead of time?
Yes, you can assemble the stuffed peppers up to 24 hours in advance and store them covered in the refrigerator. Bake when ready to serve, adding 2-3 extra minutes if baking cold from the fridge.
- → What can I use instead of chicken?
For a vegetarian option, substitute the chicken with cooked quinoa, white beans, or chopped spinach. You can also use crumbled Italian sausage or ground turkey for different protein variations.
- → How do I store leftovers?
Store cooled stuffed peppers in an airtight container in the refrigerator for up to 2 days. Reheat in a 350°F oven for 10 minutes or in the microwave until heated through.
- → Can I freeze these stuffed peppers?
Yes, freeze assembled unbaked peppers on a baking sheet until firm, then transfer to a freezer bag for up to 3 months. Bake from frozen, adding 5-10 minutes to the cooking time.
- → What should I serve with these peppers?
These pair well with a fresh arugula salad, crusty bread, or as part of an appetizer spread alongside bruschetta and olives. They also work well as a light main course with roasted vegetables.