 Save
Save My gym buddy texted me one afternoon asking if I could whip up something protein-packed that didn't taste like cardboard, and that's when these cookie dough bars entered my life. I'd been experimenting with no-bake recipes for weeks, but nothing felt right until I stopped overthinking and just leaned into what actually tastes good. The first batch came together in my kitchen on a lazy Sunday, and honestly, the smell of vanilla and almond butter alone was worth the effort. By the time I pulled them from the fridge, I knew I'd stumbled onto something special that would become my go-to grab when I needed fuel without the guilt.
I brought these to a potluck where everyone expected typical protein bars, and watching people's faces light up when they realized it actually tasted like dessert was priceless. My friend Sarah grabbed three and asked if I could make them weekly, which is when I realized I'd accidentally created a snack that bridges the gap between indulgence and nutrition. That's the moment it clicked that food doesn't have to choose between being delicious and being good for you.
Ingredients
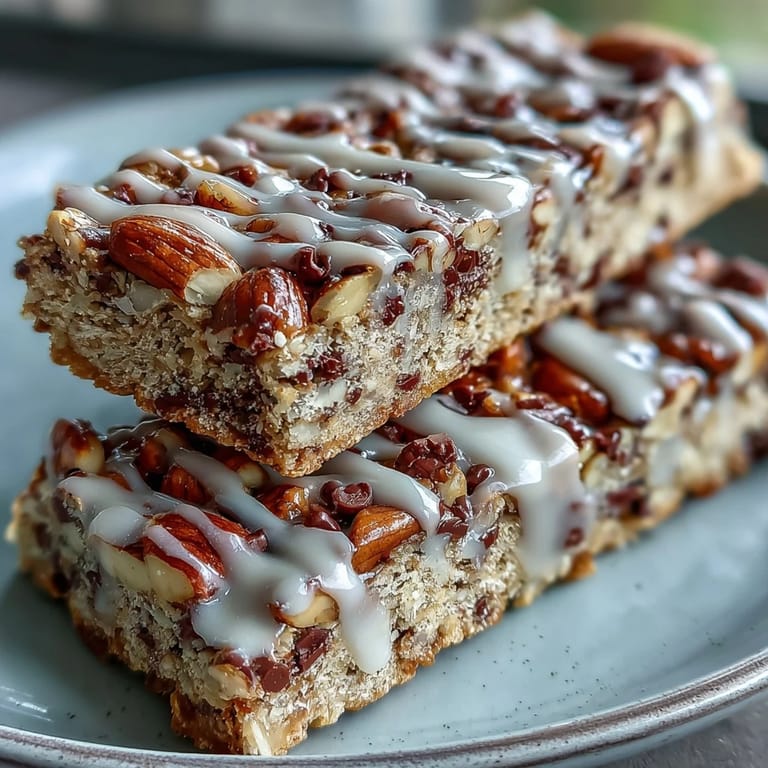
- Almond flour: This is your structure, giving the bars their firm yet tender crumb, and it's subtle enough not to overpower the cookie dough vibe.
- Vanilla protein powder: Pick whey if you want that classic milkshake taste, or go plant-based if that suits your style; either one works beautifully here.
- Natural almond butter: The creamy element that makes these bars actually taste indulgent, so don't skip it or try to get clever with a substitute.
- Maple syrup: It binds everything together while adding just enough sweetness without that artificial aftertaste.
- Unsweetened almond milk: Use this sparingly at first; you can always add more, but you can't take it back once the dough gets too wet.
- Vanilla extract: Two teaspoons is the magic number that rounds out all the other flavors and ties the whole thing together.
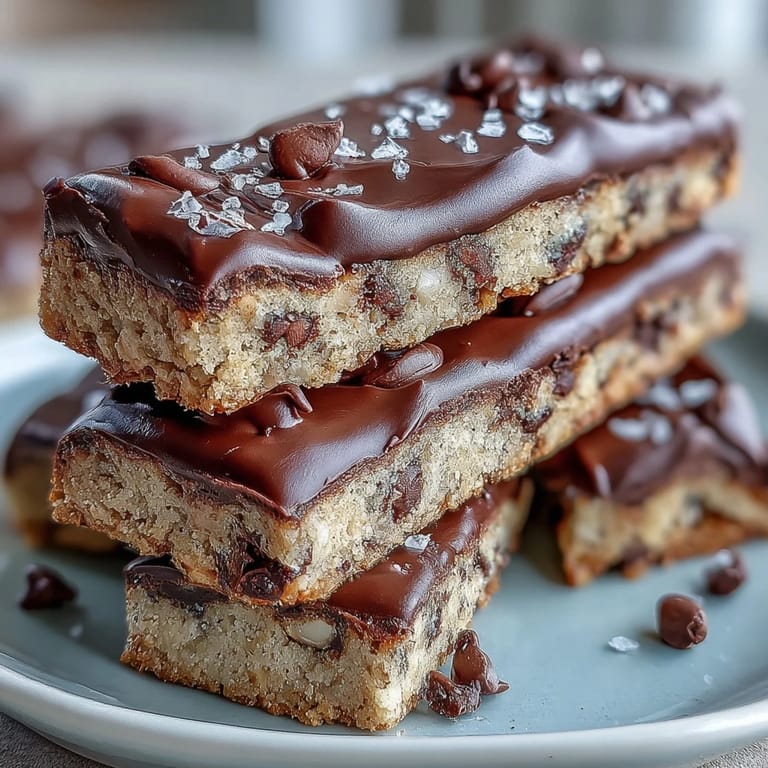
- Mini dark chocolate chips: They melt slightly when pressed into the warm dough, creating little pockets of richness throughout.
- Sea salt: Just a pinch to make everything taste more like itself and cut through the sweetness.
Tired of Takeout? 🥡
Get 10 meals you can make faster than delivery arrives. Seriously.
One email. No spam. Unsubscribe anytime.
Instructions
- Prep your pan like you mean it:
- Line that loaf pan with parchment paper and let it overhang on two sides, because trying to dig these out with a spatula is a losing battle. Trust me, the overhang is your friend.
- Build your dry base:
- Whisk together your almond flour, protein powder, and sea salt in a big bowl, making sure there are no lumps hiding in the protein powder. This is the foundation, so take a breath and do it right.
- Bring it all together:
- Pour in your almond butter, maple syrup, vanilla, and almond milk, then start stirring with purpose until you've got a thick dough that holds together. If it feels crumbly, add milk one teaspoon at a time while stirring; you want something you can press, not something that crumbles in your hands.
- Scatter the chocolate throughout:
- Gently fold in those chocolate chips so they're distributed evenly, because nobody wants a bar with no chocolate in one bite and a chocolate explosion in the next. A few gentle stirs with a spatula does the job.
- Press and smooth:
- Transfer the dough to your prepared pan and press it down firmly with a spatula, working it into the corners and smoothing the top so it looks intentional. You want it compact but not rock-hard; imagine you're tucking it in for a nap.
- Let time do the work:
- Refrigerate for at least an hour, though overnight is even better if you can wait that long. This time in the cold firms everything up and lets the flavors get cozy with each other.
- Slice with confidence:
- Use the parchment overhang to lift the whole block out, then slice it into eight bars with a sharp knife, wiping the blade between cuts for clean edges. If the bars resist, let them sit at room temperature for two minutes to soften just slightly.
- Store smartly:
- Keep them in an airtight container in the fridge for up to a week, or freeze them for longer and thaw as needed. They're perfect straight from the fridge, almost like eating a little frozen treat.
 Save
Save There's something quietly satisfying about opening your fridge and seeing these bars lined up and ready whenever you need them, like having a little pep talk stacked and waiting. It's the kind of snack that makes you feel like you've got your life together, even when everything else is chaos.
Customization Ideas That Actually Work
Once you nail the base recipe, the world opens up for tweaking. I've made versions with peanut butter instead of almond butter on mornings when that's what was in my cabinet, and they came out just as delicious with a slightly different character. The chocolate chips can be swapped for white chocolate if you want something lighter, or you can add a pinch of cinnamon if you're in a fall mood. The beauty of these bars is that they're forgiving enough to experiment with, yet structured enough that experimenting actually works.
Why No-Bake Is Actually the Right Call Here
I used to assume no-bake recipes were just shortcuts for people who didn't have time, but this one changed my perspective entirely. The lack of heat means your protein powder stays potent and nutritionally intact, and the texture you get is actually superior to anything an oven could produce. Plus, there's something beautifully straightforward about mixing, pressing, and waiting—no timers, no temperature anxiety, just your hands doing the work and the fridge doing the rest.
Storage, Freezing, and Making Them Last
These bars play nicely with your schedule, whether you're planning a week ahead or need them to last two weeks because life got busy. I've found that airtight is non-negotiable; if air gets in, they dry out and lose that chewy quality that makes them special. They thaw quickly at room temperature if you grab them frozen, or you can keep them refrigerated for that naturally cold, almost frozen-treat texture that honestly might be better than room temperature.
- Keep them in the coldest part of your fridge and they'll stay perfect for seven days, texture unchanged.
- Frozen bars last for up to three weeks and thaw in about fifteen minutes on the counter or in your gym bag.
- If you're making a double batch, freeze half immediately so you always have backup waiting in the wings.
 Save
Save These bars became my unexpected solution to the protein snack problem, and they've stuck around because they actually taste like something you'd choose to eat, not something you're choking down for gains. Make them this week and thank yourself next week when you're reaching for something actually good.
Recipe Questions
- → Can I make these bars nut-free?
Yes, substitute almond flour and almond butter with oat flour and sunflower seed butter for a nut-free alternative.
- → How do I store these bars?
Store in an airtight container in the refrigerator for up to one week, or freeze them for longer freshness. Thaw before eating.
- → Can I use a different sweetener?
Maple syrup is recommended, but honey can be used as a natural substitute to maintain sweetness and texture.
- → What protein powders work best?
Both whey and plant-based vanilla protein powders blend well for taste and texture in these bars.
- → Do I need to bake these bars?
No baking is required. They firm up in the refrigerator, making preparation quick and easy.